
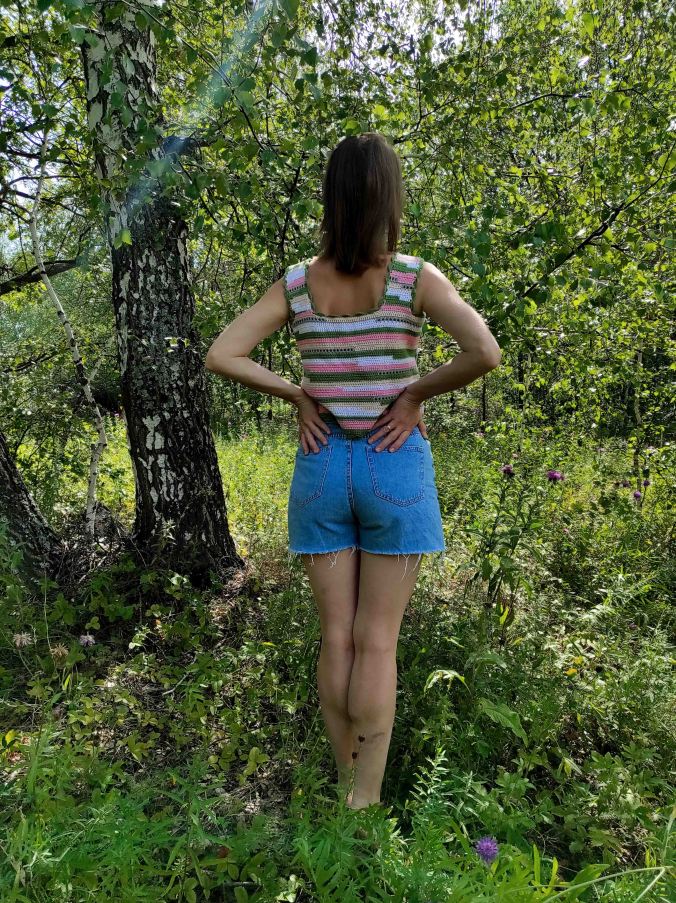
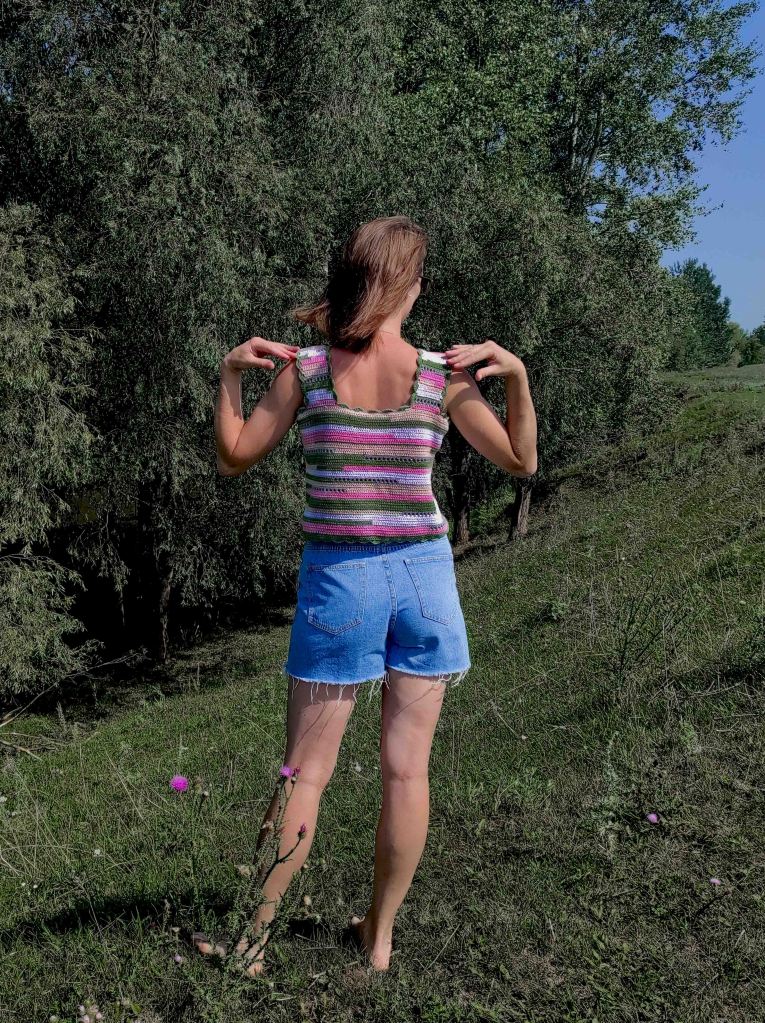


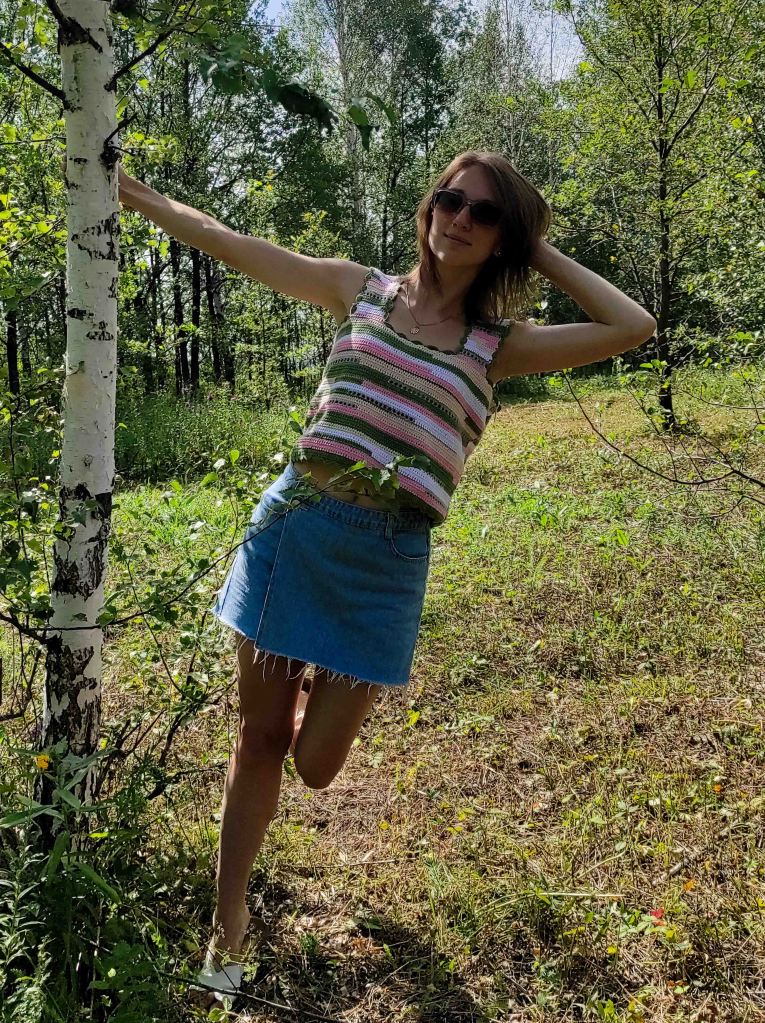
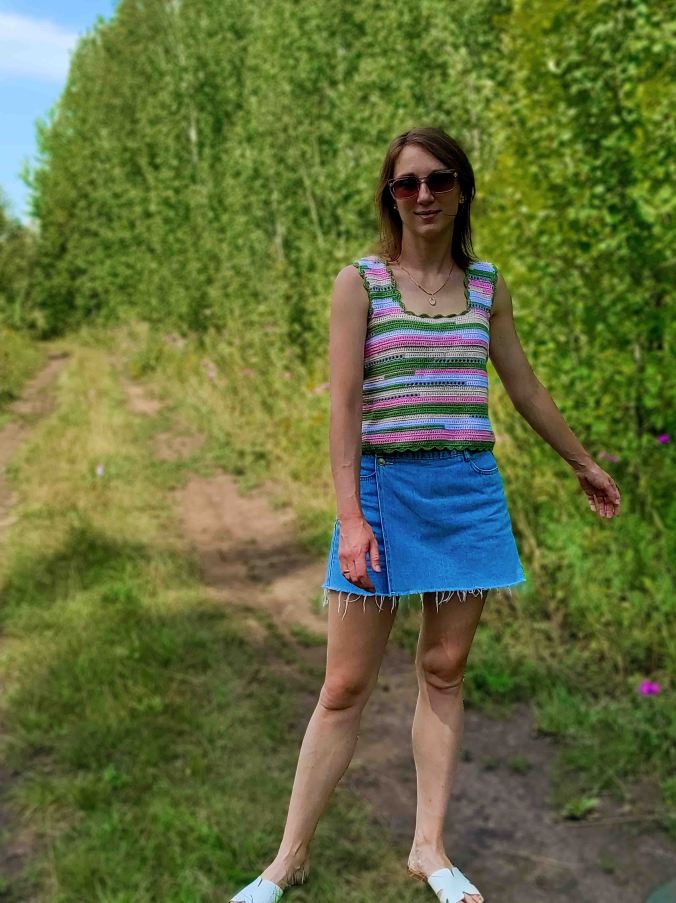
For creation these crochet top I was inspired by the astonishingly beautiful water lilies pond. White, soft pink flowers shining on the water surface of the pond, framed by magnificent green leaves. Beautiful, isn’t it? 😊
This is a very simple beginner friendly project. You have to know the basis: how to chain, slip stitch, single crochet and double crochet, no any decreases or increases. Super super EASY!
If you like my work and want to support me, or you’re interested in purchasing this pattern in a downloadable, printable PDF format, it is available for purchase on my Payment Page below.
Payment Page
Pattern notes:
- It’s a very easy two piece construction that’s sewn together after.
- This is a crop top pattern. Add rows for a longer fitting top.
Materials:
- Any No.2 Sports weight yarn
I used Alize Cotton Gold No.2 (55% cotton, 45% acrylic) 361 yds/3.53 oz (330 m/100 g)
Asparagus (103) – 1 skein;
Ballerina Pink (518) – 1 skein;
Nude (401) – 1 skein;
White (55) – 1 skein;
Any Grey (with lurex) yarn – 1 skein;
- 2.50mm Crochet Hook or other to archive gauge
- Scissors
- Yarn needle
Yarn needed: 630(690, 780, 830, 930, 1000) Yards
Gauge
Crochet Gauge (4in x 4in / 10cm) (blocked)
21 sts x 15 rows
remember to check your gauge!
ABBREVIATIONS
CH = chain
SC = single crochet
DC = double crochet
Sl St= slip stitch
SK=skip
REP=repeat
ST=stitch
SIZES
XS, S, M, L, XL, XXL
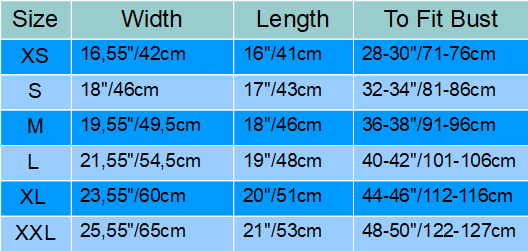
Finished Measurements (after blocked)

Panels (make 2)
Body
Make the base chain 91 (99, 107, 117, 129, 139). The first 87 (95, 103, 113, 125, 135) chain stitches make the foundation chain, while the last 3 make the turning chain) in Asparagus (green) color. Total 88, 96, 104, 114, 126, 136 sts in row.
ROW 1 [RS]: DC into the fourth chain from the hook and work 1 DC into each of the next 87 (95, 103, 113, 125, 135) sts, turn
ROW 2 [WS]: CH 1 (doesn’t count as first st), SC in each of next 88 (96, 104, 114, 126, 136) sts, turn
Rows 3-38(40,44,46,48,52): Repeat Rows 1-2.
For a longer length top, add more rows here. Repeat rows 1-2 until desired length is reached.
You’ll have a total of 38(40,44,46,48,52) rows
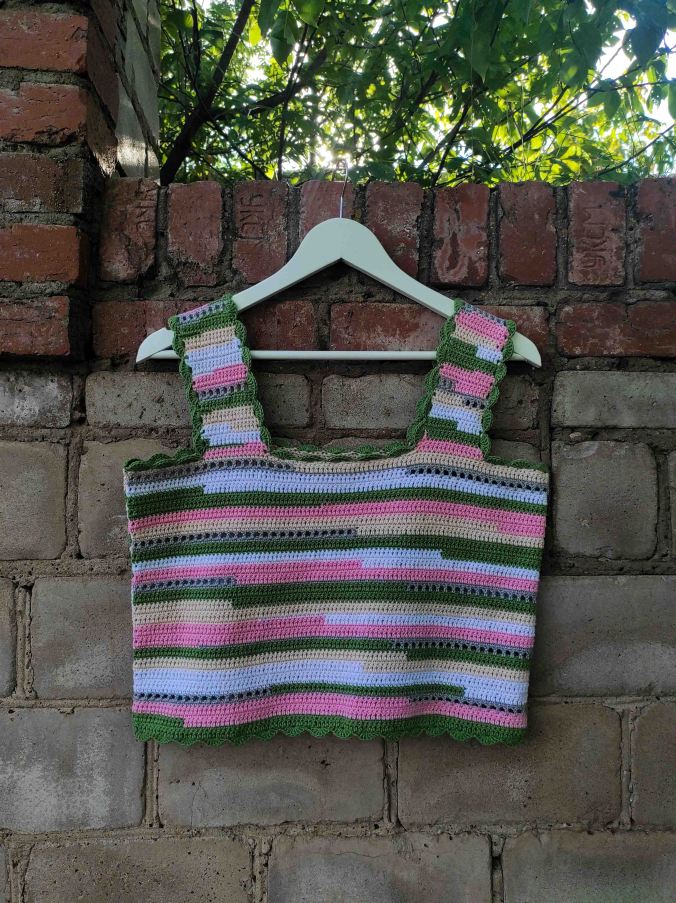
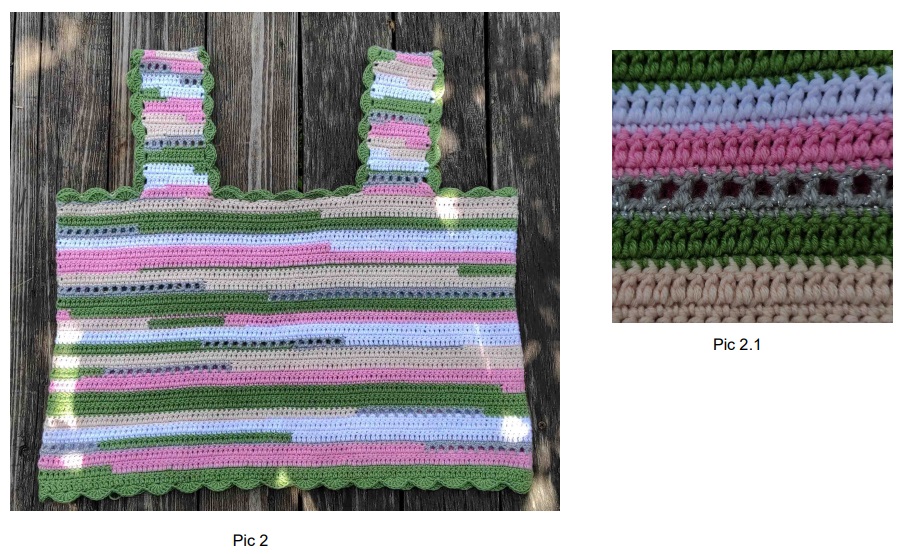
For color changing, you can follow this chart or make your own (see pic 2)
When you crochet grey with lurex yarn on RS side, crochet the mesh:
Using Grey with lurex yarn [any RS row]: *DC, CH, skip the next st, DC in next st, repeat from * (see the pic 2.1)
Straps (right shoulder, left when worn)
In the following row we will only be working partially across and leaving the remaining Sts unworked.
Row 39(41,45,47,49,53) [RS]: skip 15(17,19,21,23,26) CH 3 in next st (count as first DC), DC in the next 15 (15, 15, 15, 17, 17) st, turn. (16 (16,16,16,18,18) sts)
Row 40(42,46,48,50,54) [WS]: CH 1 (doesn’t count as first st), SC in each of next 16 (16, 16, 16, 18, 18) sts, turn. (16 (16,16,16,18,18) sts)
Row 41(43,47,49,51,55) [RS]: CH 3 in next st (count as first DC), DC in the next 15 (15, 15, 15, 17, 17) st, turn. (16 (16,16,16,18,18) sts)
Repeat previous 2 rows.
You will end on a Row 60(64, 68, 70, 76, 78)
Fasten off.
Straps (left shoulder, right when worn)
Lay your panel out with the completed shoulder on the right hand side. You will be leaving 57 ( 63, 69, 77, 85, 92) Sts unworked at the center neckline. Counting over from the last St made in Row 39(41, 45, 47, 49, 53) of the first shoulder.
Row 39(41,45,47,49,53) [RS]: skip 28(32,136,42,46,50) sts, CH 3 in next st (count as first DC), DC in the next 15 (15, 15, 15, 17, 17) st, turn. (16 (16,16,16,18,18) sts)
Row 40(42,46,48,50,54) [WS]: CH 1 (doesn’t count as first st), SC in each of next 16 (16, 16, 16, 18, 18) sts, turn. (16 (16,16,16,18,18) sts)
Row 41(43,47,49,51,55) [RS]: CH 3 in next st (count as first DC), DC in the next 15 (15, 15, 15, 17, 17) st, turn. (16 (16,16,16,18,18) sts)
Repeat previous 2 rows.
You will end on a Row 60(64, 68, 70, 76, 78)
Fasten off, leave a long tail for seaming.
Joining
Place your back and front panels together, RS facing. Sew the straps together using your seaming method of choice. Next, sew down the sides of the top using the same method. Be sure to line the back and front panel up evenly. (pic 3)

Neckline, Arm Hole and Bottom Edge Trim
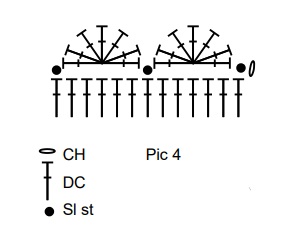
Using Asparagus green yarn (or any you like) add a shell border. (pic 4)
Neckline Trim
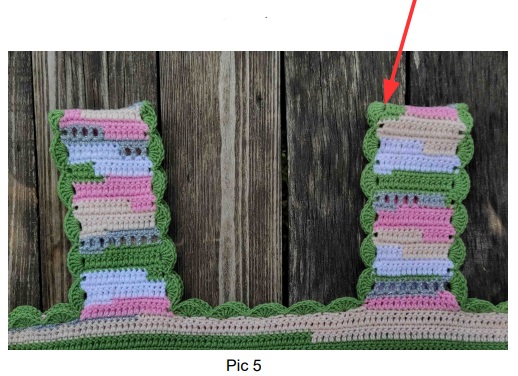
With your top right side facing out, join yarn to one of the shoulder seams with a Sl St. (pic 5)
Rnd 1: CH 1 (do not count as a st), 1 slip stitch into the same st, * skip 2 sts, Work 7 DC into the next st, skip 2 sts, sl st in the next stitch to create the shell. Repeat from * evenly around the neck opening. Join to the first Sc with a Sl St. Fasten off and weave in all ends.
When you get to the place where you did your first st and you have a few less or more st to finish the shell, it’s ok, just undo some stistches and then crochet them again, slipping or adding a few stitches to achieve the pattern. (pic 5)
Arm Hole Trim
With your top right side facing out, join yarn with a Sl St to the seam at the underarm. (pic 6)

Rnd 1: CH 1 (do not count as a st), 1 slip stitch into the same st, * skip 2 sts, Work 7 DC into the next st, skip 2 sts, sl st in the next stitch to create the shell. Repeat from * evenly around opening of arm. Join to the first Sc with a Sl St. Fasten off and repeat on other side.
Bottom Trim
With your top RS out, join yarn with a Sl St to the bottom hem. (pic 7)
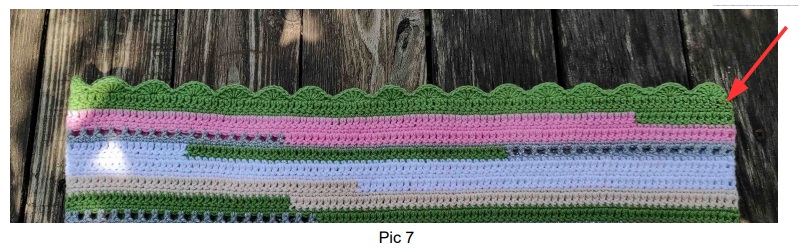
Rnd 1: CH 1 (do not count as a st), 1 slip stitch into the same st, * skip 2 sts, Work 7 DC into the next st, skip 2 sts, sl st in the next stitch to create the shell. Repeat from * evenly around. Join to the first Sc with a Sl St. Fasten off and weave in all ends.

Copyright notice:
You may not reproduce any of the photos or the text without obtaining written permission from me first.
Thank you!
